18. sep. 2010

Birthday Card


Front


Front with tag


Tag

I am going to a birthday dinner tonight. One of my best friends has her birthday today and she invited us for dinner, so I decided to make her a card. Today I have made a card with candles inside, this is my first try on this type of card and I really like it.

I think these cards are so nice and fun giving to someone. What do you think?
If anyone out there want to make this kind of card you can find the tutorial here.
Unfortunately this tutorial only is in Norwegian language, but you can make this card just by following the picture instructions.

Hope you all will enjoy making this card as much as I did.

14. sep. 2010

Baptism Card


This time I have made a baptism card, I just had to try out my new digistamp from Whimsy Stamps (at least I think it is from here). It is a girly baptism card this time, but next time I think I will try to make a boys card.
I love this stamp and I think I`m going to use this a lot :D

12. sep. 2010

Birthday Card in Black and Orange


Front


Inside

This birthday card is not made for anyone special, I just had to try out this georgeous stamp.
On this card I have used colors I do not normally use, but I think it turned out really great. The orange looks really good with the black.

I do not remember where I bought this stamp, but I really like it, this is one of more stamps in the same series and I have "Kai in snow" and another where Kai is playing with leaves. They are all really great images.

I have also used rhinestone crystals and sentiment stamps from MSE.

Wedding Card for an old friend


I made this wedding card for an old friends wedding in August this year.

I used this lovely digital stamp from Whimsy Stamps called Wedding Cake and Kisses. I painted it with Distress ink - Vintage Photo.

The embellishments I have used is; rhinestone crystals from Papirplaneten, flowers from Kort og Godt and silver ribbon.

Paper CupCakes Challenge - PCC challenge with receipe


Front


Inside


This card is made for the challenge over at Paper CupCakes.
The receipt to follow was:

1 Ribbon
2 Embellishments
3 DPs
4 Flowers

This is my supply list:

3 DPs from Blue Hills Studio
Purple ribbon fra Gillers Hus
Silver metal butterfly from Kort og Godt
Paper CupCake digital stamp image.


I have used a little more than 4 flowers so I just have to see how it goes.

2. aug. 2010

Gift Box

I had a box which had chocolate inside (empty now - lol). The size of the box is so suitable to use when giving away a little something so I thought I might use it to make a gift box.

I bought some new patterned papers at Gillers Hus that is just adorable. I love them!!! The inside of the box is also "dressed" with patterned paper.
When making this box, I was amased by how elegant and luxurious the box was looking.

I embellished with flowers from Kort og Godt and used a simple sentiment stamp (from somewhere - I think it is Kreativ Hobby) - "It is your day to day - Congratulations" , just so it would not be too much. I also used a piece of brown ribbon around the lid of the box.

Check out how it turned out. I think it turned out great.


I took a picture without blitz as well....just so you can see that the paper is gold patterned. It is kind of hard to see on the other pictures :D

1. aug. 2010

Wedding Card

I bought a new wedding stampset yesterday and I just had to try at least one of the stamps. I am not sure which brand the stamps are, but I think it is Morehead.
I also bought a new wedding sentiment stampset, but I have not used it on this card.


I do not know anyone who is going to get married this year so I guess I have to save it until I do, or I can sell it to someone who want to buy it :D

My Niese Turning 12 Years Old

One of my nieses is turning 12 years old August 23rd, so I had to make her a little card to give her on her day.
Since she is kind of a girly girl I have made a card in dark pink - with flowers and lots of glitter. I really love making these kinds of cards and the more glitter the funnier :D

Since there is not a lot of space to write a greeting on this card, I have made a tag that I fastened with a piece of silver tread on the inside of the card. You can see a littel bit of the tag behind the number 2.

Challenge - again :D

This time I have made a tag card. I have made this card for the following challenges:

One Powerful Hour - Use your favourite flower on the project.

Anyone for Anya - Stich It!! - Use stiches on your project.


I have used white paper which I cut out to form a tag. I then colored it in with brown ink. I used a die cut for the thanks sentiment, layed it flat on the tag and sprayed over with chocolat brown glimmermist. Afterwords I distressed the sentiment with white distress powder and placed the tag on a piece of mustard colored bazzil. One of my favourite flowers is roses so I have used roses, rosebuds and leafs from Kort og Godt. I underneath the flowers I have used a piece of Magic Mesh. I have pierced holes all around the tag and drawn in stiches in between with pen.

This is all I have for these challenges! :D

31. juli 2010

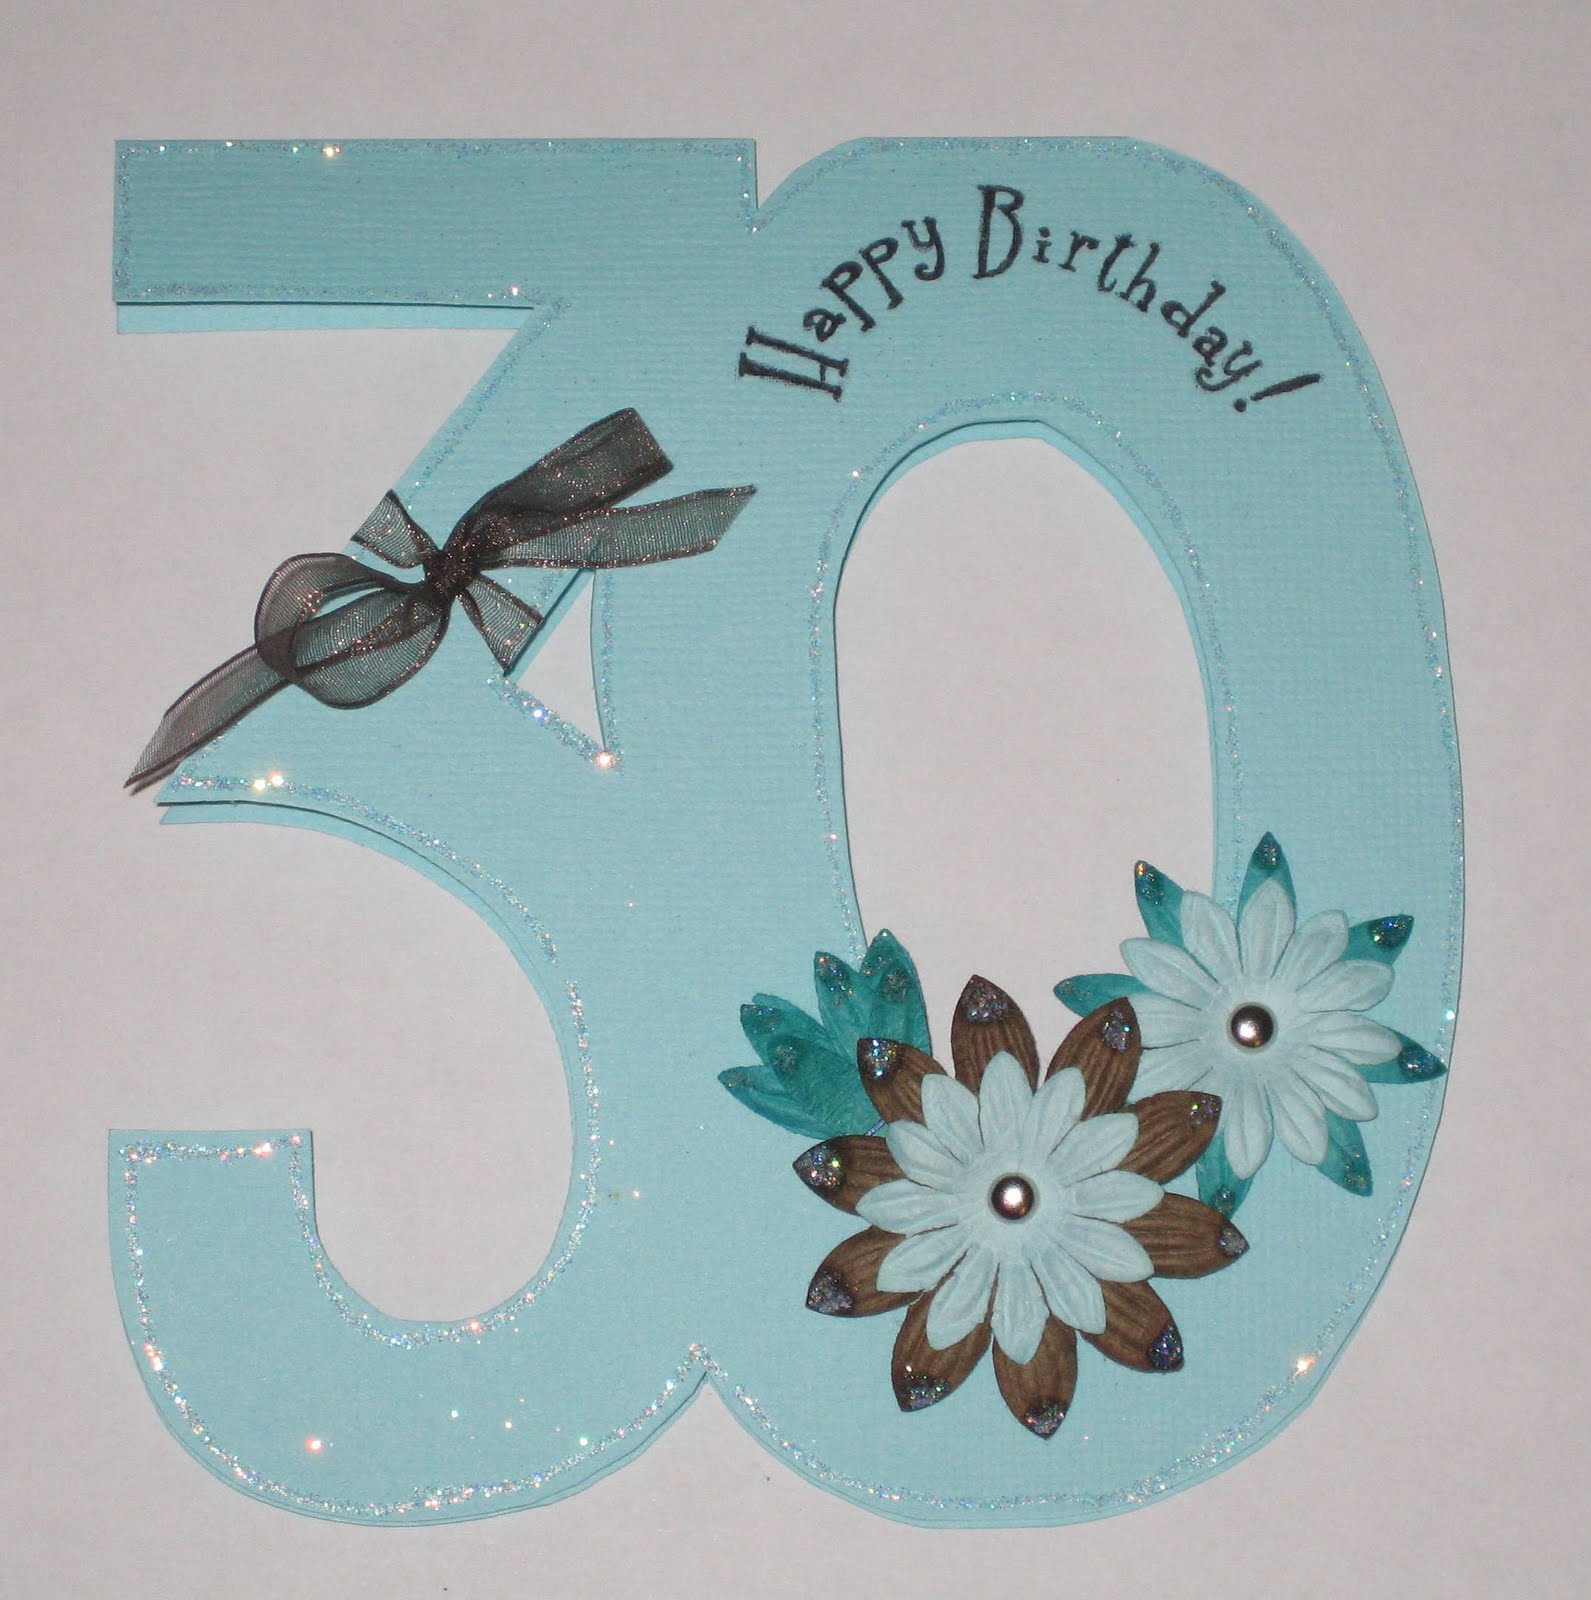
Birthday Card

This is a card that I made for one of my friends sisters 30th birhtday. I was only supposed to help her out a little bit - giving her some ideas on what to make etc-, but it turned out to be doing the whole card :D
So here is how it turned out.


I have used turqoise bazzil, flowers, silver brads, brown ribbon and glitter on this card. The stamped sentiment is a stamp from MSE`s Birthday set.

Utfordring #11 - Kammerpikenes Skisse

Next card has been made for the challenge over at Scrappekammeret.
You can see the sketch we were to follow this time over at their site.

Here is my entry for this challenge.


I have used dark brown bazzil as base. The 4 squares is glossy paper brayered with brown ink. When the ink was almost dry I brushed over with a piece of paper and then stamped with swirl stamps and embossed with white embossing powder on two of the squares.
The image used on this card is Magnolia (Tilda) I think and she is colored in with distress ink.
I have used black half pearls in each corner of the card.

Artsy Challenge - Mosaic Card

Well....I am not doing any better on my blogging yet, but I am posting a few cards for some challenges now.
First one up is the challenge over at Stampartic. The challenge this time is called Artsy Challenge - Mosaic Cards.

So here is my entry for this challenge.


I have used white and brown bazzil. The mosaic pieces is white paper colored in with pink ink, then I stamped with swirl stamps and embossed with white embossing powder.
I have used a brown butterfly made of metal tread and dark brown stockings, stickles glitterglue and a piece of brown ribbon. The stamped sentiment is a stamp from MSE`s Birthday set.

1. juli 2010

Long time.......no blogging!!

It has been a really long time since my last entry on my blog.
I have too many things to do for the time being so my card making is kind of "dead" right now.

We are re-decorating our kitchen so I do not have so much time to make cards these days, but I really hope my inspiration will come back when I finished with the kitchen. We are going to start on the bathroom when the kitchen is done, but I think I need a brake before even thinking of starting that project :D

Specially since I have to do the whole kitchen myself :D

My dear hubby had a motorbike accident and he therefore can not do anything for at least 6 weeks.....he had a few broken bones etc and had to go through surgery so here I am.......doing all the hard work myself :D

But I am happy, it looks like the kitchen is going to look great when it is finished (if it ever will be!!)

Well, this was just a little note to tell all of you that follows/visits my blog that I am not dead or anything......I just have a little too much to do nowadays. I will try making some cards again soon.

I wish you all a great summer!! :D

25. apr. 2010

Challenges

I haven`t been very active on my blog lately, and my card making activity has been really slow also. I thought that I might be able to pick up again by starting with a couple of challenges again.
I have choosed to make an entry to Bizzy Beck challenge, A Spoon Full of Sugar ; Simon Says Challenge and Crafty Creations today.

Bizzy Becks Challenge this time was: Create something with wings and flowers.
The stamped image I used is Bryony, which I think is so adorable and she has both wings and flowers on her so I covered the challenge just by using this stamp :D

A Spoon Full of Sugar`s Challenge was simply Happy Birthday. So this was quite simple to combine with other challenges :D

Simon Says Challenge was anything with wings, and since I have painted a fairy this will fit in this challenge.

Crafty Creations Challenge was to use some kind of distressing. And since I have distressed the sentiment with Seafoam White Distress powder this will fit in this challenge as well.


So here is my entry for the challenges.


5. apr. 2010

Boys Birthday Card

This card is a boys birthday card. I got my inspiration for this card at Youtube. I think it is so decorative with the tiles behind this little boy.


Front


Inside


Quick Tutorial:

Base card is cut at 12" (30cm) x 4 5/8" (12cm) - Score at 6" on the long side.

Tiles are cut at 5/8" (1,1cm) wide, the lenght is different so you have to decide how long you want them to be.
Tiles are adhered to a piece of white cardstock, when finished adhering tiles just cut the white cardstock so just a little bit shows outside the tiles and adhere to card front.

The little boy is colored in with Distress Ink. I used two stamped images - cut the boy out of one of the them and glued him on top of the other with some 3D dots to get a little bit of the 3D effect.

The balloons on this card is actually from another stamp, I just cut them out from the stamped images and colored them in. I used a little bit of silver thread on the balloons.

The sentiment Hats off to You is a stampset from MSE. I have used white embossing powder to make it stand out a little bit more than if I had just used the white ink.

The inside is a piece of white cardstock - cut at 4 3/8" (11,1cm) x 5 6/8" (14,6cm). I have used the left over tiles to make the border on the left side. After adhering the tiles I have cut the white cardstock after the shape the tiles made.

Well this might not be the best tutorial in the world, but I hope you understand what I have done.
If there is something you do not figure out you are welcome to contact me if you want.

4. apr. 2010

1 Drawer Card

The following card I made following a tutorial I found Papirgleder. It is fun to make, but since I have only made this one time before I spent quite some time finishing this one.
This is a great card for either birthdays, confirmations or also just to share someone up with a little gift.


Front


From the side


Inside front card

1. apr. 2010

Birthday card

This is a quite simple birthday card I made. I made this just to try out my new stamp Madelynn, which I bought from Greeting Farm. I love this stamp, she is so adorable :D
The Happy birthday to you stamp is bought from MSE (My Sentiments Exactly).

I have only taken a picture of the front this time.


On this card I have used brown, creme and blue bazzill, patterned paper, crystal stickers, paper flowers and ribbon.

I used my cuttlebug and nestabillities to cut out the oval and scalloped oval to adhere Madelynn on. Madelynn is painted with distress ink.

I do not remember the measurements on this card, but if you want to make one like this you can just make it the size you want. :D

Card with bookmark

This is such a cute and fun card. I found this tutorial here, Dawn is making a lot of fun stuff - go check it out :D

Front of card


Bookmark


Inside of card


Quick Tutorial

You need:

Cardstock, Flowers, brads, prisma pearls, prima bling (or any embellishment you want), ribbon and patterned paper. You will also need a perforator tool, or of course you can use a piercing tool if you want. I find it easier using a perforator tool.

Cardstock measurements (using my cards as example):

Base of card:
Brown cardstock - 11" x 4 1/4" - Score at 4 1/4" and 8 5/8". Use perforator tool on 8 5/8" score line.
Creme Cardstock - 4" x 4"
Patterned paper - 3 3/4" x 3 3/4"
Laced paper - 3 3/4" length, you need to choose the height/width yourselves.

Brown cardstock - 2 1/4" x 2 1/4"
Creme cardstock - 2" x 2"
This is the cardstock pieces where you are to adhere the embellishments on the front.

Bookmark:
Creme cardstock - 2" x 4"
Patterned paper - 1 1/3" x 3 3/4"
Laced paper - 3 3/4" length, you need to choose the width yourselves.
Ribbon to attach on the top of the bookmark- i used a piece that is 2" long, folded in in half and stapled on to the backside of bookmark.

Embellish the card as you want after adhering all pieces togther.

Have fun!!

24. mars 2010

Confirmation Card

I found a great tutorial for this box with 4 drawers in Kirstens blog. I recommend you to go check out her blog, she makes so many beautiful things.

This box was really fun making, but it takes some time though. I think I have been working on this one for like 3 days or so. But I think it turned out really great for my first time trying :D

If you wanna try making this box as well, just visit Kirstens blog. Follow the link above.

Front of the box.

Front with some of the drawers open.


Inside of the card.

On the left inside I had stamped Happy Birthday - I did not realize that I had used the wrong stamped sentiment before inserting the picture here so I had to take out the picture and erase the sentiment in Photoshop before inserting it again. I will correct this on my card a little later. Kind of stupid making a confirmation card and have Happy Birthday on the inside...lol :D

18. mars 2010

Birthday Card


This is a card I made for my boyfriends birthday this year. I had so little time to make the card this year so I made a quite simple card this time. Anyway, I think it turned out quite nice.
I like the simple cards the best :D